This fork is no longer maintained and has been archived.
Please use the actively-maintained, modernized successor, which descends from this fork (it forked from here) and reimplements everything on a coordinator-based architecture with tests, a Repairs flow, selective per-resource monitoring and support for current Home Assistant versions:









Monitor your OpenMediaVault 5/6 NAS from Home Assistant.
Features:
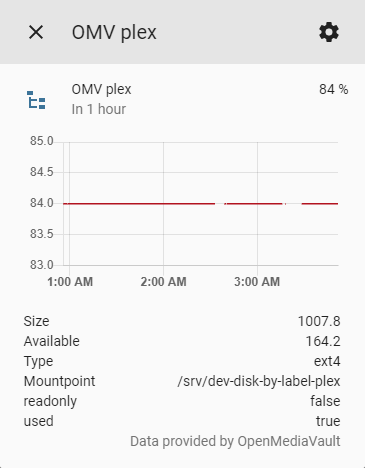
- Filesystem usage sensors
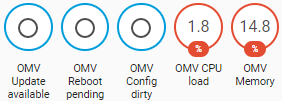
- System sensors (CPU, Memory, Uptime)
- System status sensors (Available updates, Required reboot and Dirty config)
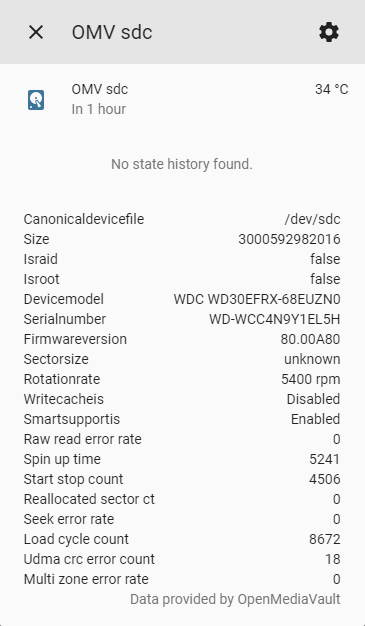
- Disk and smart sensors
- Service sensors
Monitor your filesystem usage.
Monitor your OpenMediaVault system.
Monitor your disks.
This integration is distributed using HACS.
You can find it under "Integrations", named "OpenMediaVault"
Setup this integration for your OpenMediaVault NAS in Home Assistant via Configuration -> Integrations -> Add -> OpenMediaVault.
You can add this integration several times for different devices.
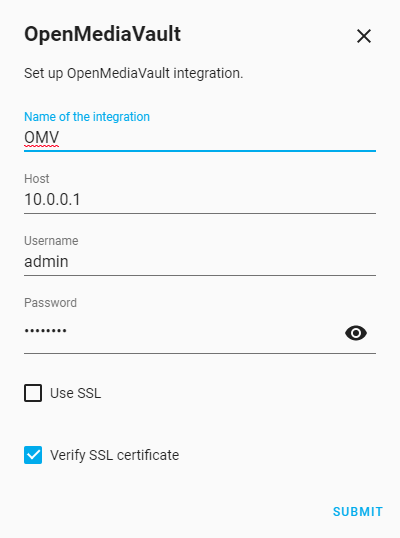
- "Name of the integration" - Friendly name for this NAS
- "Host" - Use hostname or IP
- "Use SSL" - Connect to OMV using SSL
- "Verify SSL certificate" - Validate SSL certificate (must be trusted certificate)
To help out with the translation you need an account on Lokalise, the easiest way to get one is to click here then select "Log in with GitHub". After you have created your account click here to join OpenMediaVault project on Lokalise.
If you want to add translations for a language that is not listed please open a Feature request.
To enable debug for OpenMediaVault integration, add following to your configuration.yaml:
logger:
  default: info
  logs:
    custom_components.openmediavault: debug
This version includes several changes and improvements over the original repository.
This integration now provides sensors to monitor your GPU.
| Sensor ID | Name | Unit |
|---|---|---|
system_gpuUtilization |
GPU load | % |
system_gpu_freq_cur |
GPU Current Frequency | MHz |
system_gpu_freq_max |
GPU Max Frequency | MHz |
A new sensor is available to monitor the health of your RAID arrays.
| Sensor ID | Name | Attributes |
|---|---|---|
raid |
(Name of the RAID device) | state, level, health_indicator, action_percent |
This version incorporates the following pull requests from the original repository:
Per-container sensors (one entity per Docker container) were never removed when
a container was deleted. Each orphaned entity then raised a KeyError on every
update cycle, which could also desync the Home Assistant recorder
(StaleDataError) and freeze history graphs.
This fork now:
- marks an entity unavailable instead of crashing when its container is gone, and
- automatically prunes per-container entities once their container disappears (system sensors are never touched).
This integration relies on information from the following system files:
/sys/class/drm/card*/device/gpu_busy_percentfor GPU utilization./sys/class/drm/card*/gt_cur_freq_mhzfor GPU current frequency./sys/class/drm/card*/gt_max_freq_mhzfor GPU max frequency./proc/mdstatfor RAID status.
When running Home Assistant in a Docker container, you must expose these files and directories from the host to the container for the integration to work correctly.
- For GPU monitoring, you need to mount the
/sys/class/drmdirectory. - For RAID monitoring, you need to mount the
/proc/mdstatfile.
Example docker run command:
docker run ... -v /sys/class/drm:/sys/class/drm:ro -v /proc/mdstat:/proc/mdstat:ro ...Example docker-compose.yml:
services:
  homeassistant:
    ...
    volumes:
      - /sys/class/drm:/sys/class/drm:ro
      - /proc/mdstat:/proc/mdstat:ro
    ...