The package is meant to be highly configurable with an object-oriented modular approach and a main configuration file defined by the user. EMHASS was designed to be integrated with Home Assistant, hence its name. Installation instructions and example Home Assistant automation configurations are given below.
You must follow these steps to make EMHASS work properly:
-
Install and run EMHASS.
- There are multiple methods of installing and Running EMHASS. See Installation Method section to pick a method that best suits your use case.
-
Define all the parameters in the configuration file (
config.json) or configuration page (YOURIP:5000/configuration).- The default configuration does not need to retrieve any data from Home Assistant! After installing and running the add-on, EMHASS should start and it will be ready to launch an optimization.
- See the description for each parameter in the Configuration section.
- EMHASS has a default configuration with 2 deferrable loads, no solar PV, no batteries and a basic load power forecasting method.
- If you want to consider solar PV and more advanced load power forecast methods, you will need to define the main data entering EMHASS. This will be the Home Assistant sensor/variable
sensor.power_load_no_var_loads, for the load power of your household excluding the power of the deferrable loads that you want to optimize, and the sensor/variablesensor.power_photovoltaicsfor the name of your Home Assistant variable containing the PV produced power (if solar PV is activated). - If you have a PV installation then this dedicated web app can be useful for finding your inverter and solar panel models: https://emhass-pvlib-database.streamlit.app/
- If you want to consider solar PV and more advanced load power forecast methods, you will need to define the main data entering EMHASS. This will be the Home Assistant sensor/variable
-
Launch the optimization and check the results.
- This can be done manually using the buttons in the web UI
- Or with a
curlcommand like this:curl -i -H 'Content-Type:application/json' -X POST -d '{}' http://localhost:5000/action/dayahead-optim.
-
If you’re satisfied with the optimization results then you can set the optimization and data publish task commands in an automation.
- You can read more about this in the Usage Guide section.
-
The final step is to link the deferrable loads variables to real switches on your installation.
- An example code for this using automations and the shell command integration is presented in the Usage Guide section.
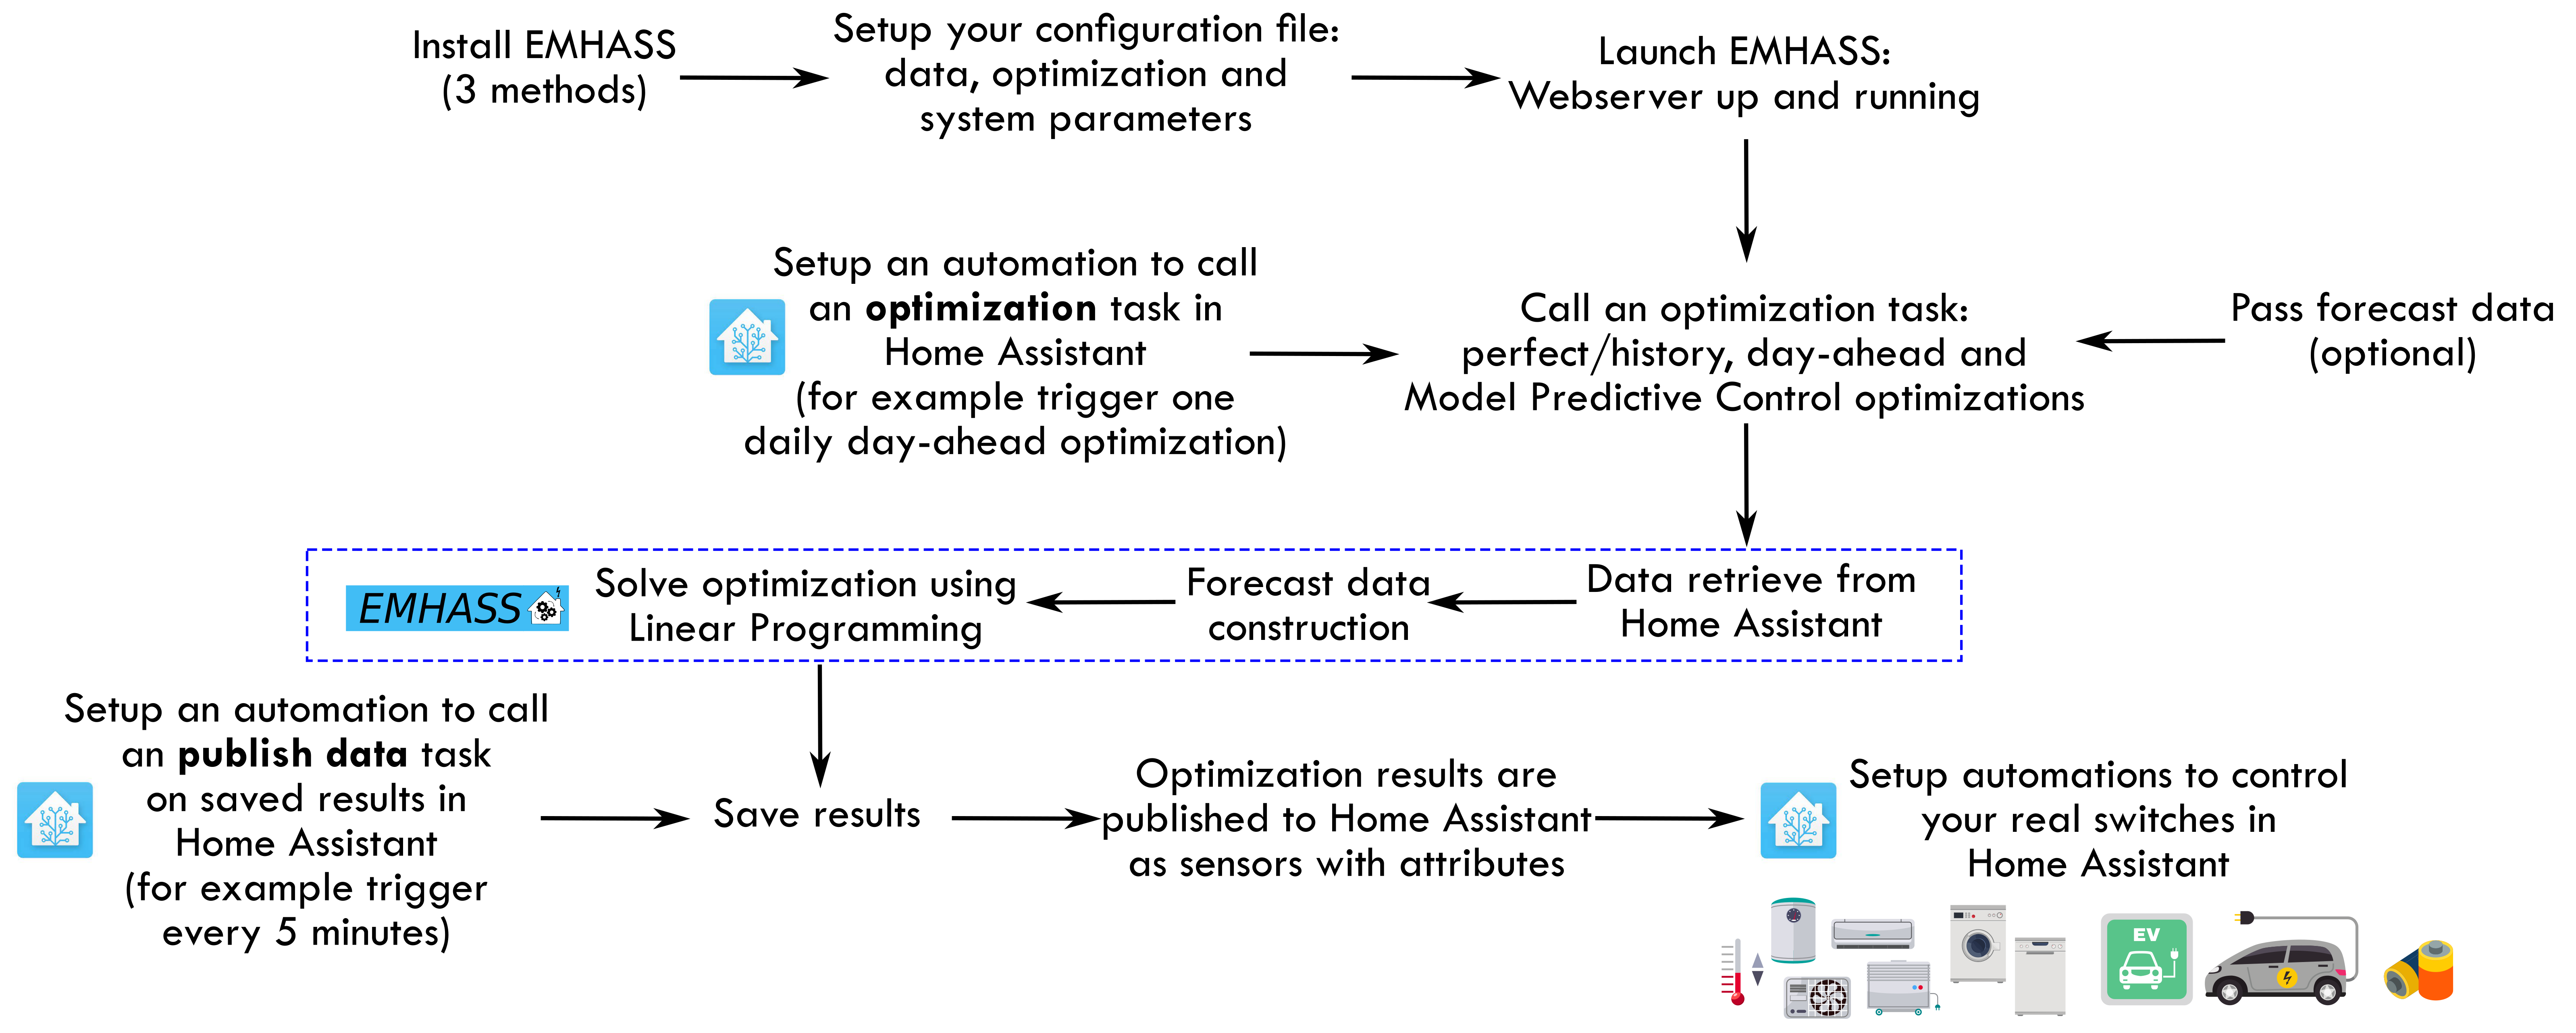
A more detailed workflow is given below: